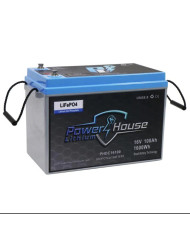
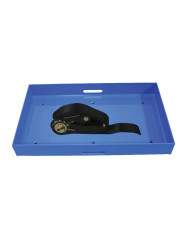
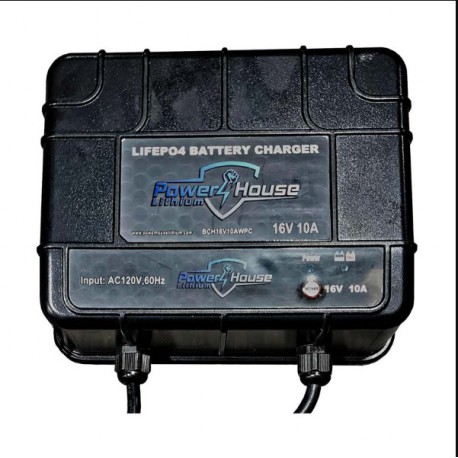
16V lithium marine waterproof charger. This charger is 100% waterproof and can be mounted onboard your boat as you normally would with marine battery chargers!
This charger has built in low voltage cut off charging activation with a push of a button.
This means when you run your lithium batteries all the way down they will reach what is called low voltage cut off, when this is reached the BMS (battery management system) basically turns the battery off at this point showing zero to little voltage to where the charger doesn't recognize that there is a battery connected.
The activation button adds a short pulse charge into the battery waking up the BMS and allowing charge to start entering the battery.
WARRANTY REGISTRATION
We recommend you protect your investment and register your warranty. If your battery is not registered within 90 days of purchase, warranty will be voided. Proof of ownership is required. Warranties are not transferrable.
WARRANTY
DEEP CYCLE 40AH + BATTERIES
2-years total
Repair or replace free any time inside of 24 months or 2000 battery cycles haggle free (whichever comes first). T's & C's apply
Design life - 5 years or 6000 cycles
Warranty can be extended to 3 years if the system is fitted with PowerHouse Lithium approved or Victron chargers
Images of the installation with the approved chargers must be uploaded when registering the battery for 3-year extension to apply
CRANKING BATTERY
2-years total
1 Year Free Replacement, Haggle Free
Year 1 through 2 - Replacement cost will be at a 30% discount off SRP*
WARRANTY FOR DEEP CYCLE BATTERIES UP TO 30AH
1-year total
Free repair or replacement any time inside of 6-months from purchase date. (Excluding exclusions)
30% discount from 6 months to year 1
All warrantied items will be subject to the cost to ship from Powerhouse Lithium SA to your location
Warrantied price is based on current SRP
** Note Life of a LiFePO4 battery will be reduced by not using the proper approved chargers.
If warranty claim is necessary, please go to: https://powerhouselithium.co.za/pages/battery-warranty-claim to start this process.
TERMS AND CONDITIONS OF WARRANTY
All warranties commence from date of manufacture.
Damage due to improper installation; loose terminal connections, under-sized cabling, incorrect connections (series and parallel) for desired voltage and AH requirements, or reverse polarity connections.
Environmental damage; inappropriate storage conditions as defined by the Manufacturer; exposure to extreme hot or cold temperatures, fire or freezing, or water damage including submersion.
Storage – Battery that has not been charged for over 1 year. Battery not stored in adherence to the Manufacturer's storage guidelines, including storage of the Battery at low state-of-charge (charge your battery to full before storing).
Over Cycling - To ensure longevity and maximum performance batteries should not be completely discharged down to 0% SOC (state of charge) and re-charged to 100% SOC more than 3 times per week, or a maximum of one discharge cycle down to 20% SOC more than once daily. Usage exceeding this results in the cells being over cycled beyond what is considered normal use and will void the performance warranty of the battery.
Damage caused by collision
Modifications
Unauthorized repair
External causes such as accidents, abuse, or other actions or events beyond our reasonable control.
This warranty does not cover any shipping costs of batteries or loan units, these costs will be the responsibility of the purchaser. Alternatively, the purchaser can return the unit under warranty from the distributer where the unit was purchased.
Warranty voided if storage, transportation warnings and tips warnings are not followed.
All warrantied items will be shipped to Powerhouse Lithium SA on the clients account.
Bluetooth APP
App supports Apple and Android platforms for the deep cycle batteries. The Bluetooth signal is strong and can be connected within 32 feet, if the signal is clear of obstructions.
All of our deep cycle batteries above 40AH are Bluetooth enabled and the monitoring app can be found on google play store for Android and the App Store for iPhone by searching Powerhouse Lithium.
CHARGER AND EXTRA COMPONENTS WARRANTY
Chargers, wiring kits, all components etc are subject to a 6-month manufacturers defect warranty.
NON-TRANSFERABLE
This Limited Warranty is to the original purchaser of the Product and is not transferable to any other person or entity.
WARRANTY EXCLUSIONS
The Manufacturer has no obligation under this Limited Warranty for Product subjected to the following conditions (including but not limited to):
Water damage, impact, or collision
Physical damage to battery case or mishandling of the product
Product that has been opened, modified, or tampered with
Tampering or removal of manufacture date codes
Product that was used for applications other than which it was designed and intended for by the Powerhouse Lithium SA over the rated continuous amp rating
All warranty replacements are only effective from Purchase date (not from replacement date)
This Limited Warranty does not cover a Product that has reached its normal end of life (2000 cycles) due to usage which may occur prior to the Warranty Period.
A battery can deliver only a specific amount of Energy over its life which will occur over different periods of time depending on the use.
The Manufacture reserves the right to deny a warranty claim if the Product is determined, upon inspection, to be at its normal end of life even if within the Warranty Period. All warranties on batteries are voided if non-approved chargers are used. Please contact Powerhouse Lithium SA for an approved chargers list.
LIABILITY
Powerhouse Lithium SA is not liable for any damages or injuries caused by any of its products.
SUBMITTING A WARRANTY CLAIM
To submit a warranty claim, please refer to our warranty application. The Product may be required to be shipped back to Powerhouse Lithium SA for further inspection.
RETURNS POLICY
Returns are accepted within the first 30-days based on the following:
All returns are subject to a 10% handling fee based on current SRP, plus all shipping costs.
Return product in original packaging with return number enclosed inside of the box.
For our mailing address, please send us an email on info@powerhouselithium.co.za.


